Hello!
This post has been coming for a little while, but I wanted to make sure I felt informed before I wrote it so I could give you the most correct information possible. This review is about Hand and Nail Harmony's soak off gel polish brand, Gelish. So if you want to read on, maybe grab a cup of tea or coffee, sit down and relax!
 |
| Gelish Need a Tan |
 |
| Gelish Need a Tan |
I decided to go with Gelish as it's readily available in stores, I don't have to order online and it has outstanding reviews! It's both UV (Compact Flurescent Light) and LED curable and can be bought in a kit for the DIYer. That's me! I obviously like doing my nails at home and I think I'm fairly competent at it, so I figured I could do gel. One of the key things with gel is that you need to be neat with your application, once you cure the polish, it's cured, it ain't coming off unless you soak it off. It's also advised to minimise contact with skin due to the potential for allergic reactions.
 |
| Mini Pro 45 LED Light (Source) |
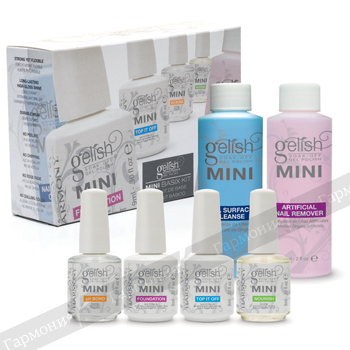
I started off with the Gelish Mini Basix Kit ($44.95 from PriceAttack or Hairhouse Warehouse) and the mini Pro 45 LED lamp ($69.95 from PriceAttack or Hairhouse Warehouse). I wanted to go with LED (as opposed to CFL UV) as the bulbs last forever (+ 55,000 hours) and the curing time is shorter. However, not all gel is LED curable, so keep that in mind. also, whilst we're on the topic of lamps, both LED and UV lamps emit UV rays, yes despite the name they do the same thing. However, the wavelength they use is different which is what makes the polish able to cure faster. From articles I've looked at and studies I read neither type of lamp will give you cancer if used as recommended. Both emit relatively low levels of UVB rays (the tanning rays), the light is mostly in the UVA spectrum. If this still worries you I recommend looking up studies or articles produced by Doug Shoon, the expert in UV gel nail systems. Very informative stuff. One gel manicure is equivalent to an extra 1.5 to 2.7 minutes of sunlight per day, assuming you redo your gel mani every 2 weeks. I was shocked by this, I actually expected to find negative studies, 1 to minutes of extra sun a day to me is really negligible considering my routine. If this still bothers you though you can wear densely woven gloves with the finger tips cut off or you can apply sun cream prior to your mani.
 |
| Gelish Mini Basix Kit (Source) |
Back to the Gelish. My Mini Basix Kit contained:
1 x 9ml pH Bond, Foundation Basecoat, Top It Off Topcoat, Nourish Cuticle Oil
1 x 60ml Nail Surface Cleanse, Artificial Nail Remover
1 x File/buffer
1x Wooden cuticle stick
1 x Plastic nail buffer (plus extra sticky heads for it)
There is no colour polish sold with the kit, that must be bought separately (~$22.95 from PriceAttack or Hairhouse Warehouse for the 9ml bottles). I located a Gelish distributor who was able to sell me the colour polishes for $16.50 for the 15ml "pro" size product. I bought colours for french manicures and also Vitagel which is a 'nourishing' and strengthening product. It's important to note that although Gelish can be bought without a license it's still a professional product and you should take your time researching the product and thoroughly understand how to use it.
I'm not going to go through how to apply Gelish but I will tell you some tips that I found whilst researching.
1. When using the basecoat try to use thin coats. Wipe the brush off on the neck several times before applying it and when you do you can use that one brushful for 4 nails. Wipe some product onto each nail and then scrub the product in with the brush to spread it out and really work it your nails. Also, CAP THE TIPS! So important!
2. Dry brush the foundation layer. With a dry clean brush (I bought a cheap set of brushes from the art store) swipe it across the cured gel. There's a tacky residue and brushing it will make the nail more matte looking. this helps to even out the colour coat and stop shrinking of the colour. Clean your brush with acetone or isopropyl alcohol.
3. Use thin coats for every layer. and I mean thin. take what you think thin is and then half it, no quarter it and that's the thickness of each coat.
4. If you have a small lamp like I do (it only fits 4 finger, so thumbs must be cured separately) tilt your nails up at an angle to try to get the capped free edge to cure, or cure the undersides of your nails separately.
4. Depending on the brand of remover you use, non acetone remover will remove Gelish. I have the woollies home brand acetone free remover and it will successfully remove the gel polish.
5. If applying regular nail polish over your gel mani use acetone or acetone remover to remove it and swipe lightly. Do not wrap your nails and soak the polish off, the gel will come off too! Guess how I found that out . . . I have successfully removed 5 manicures from on top of my gel and my left hand looked the same as day I. The right hand was just starting to peel up at the cuticles. The reason I recommend using acetone is because it evaporates fast and doesn't soften the gel like my acetone free remover does. Just be careful with it.
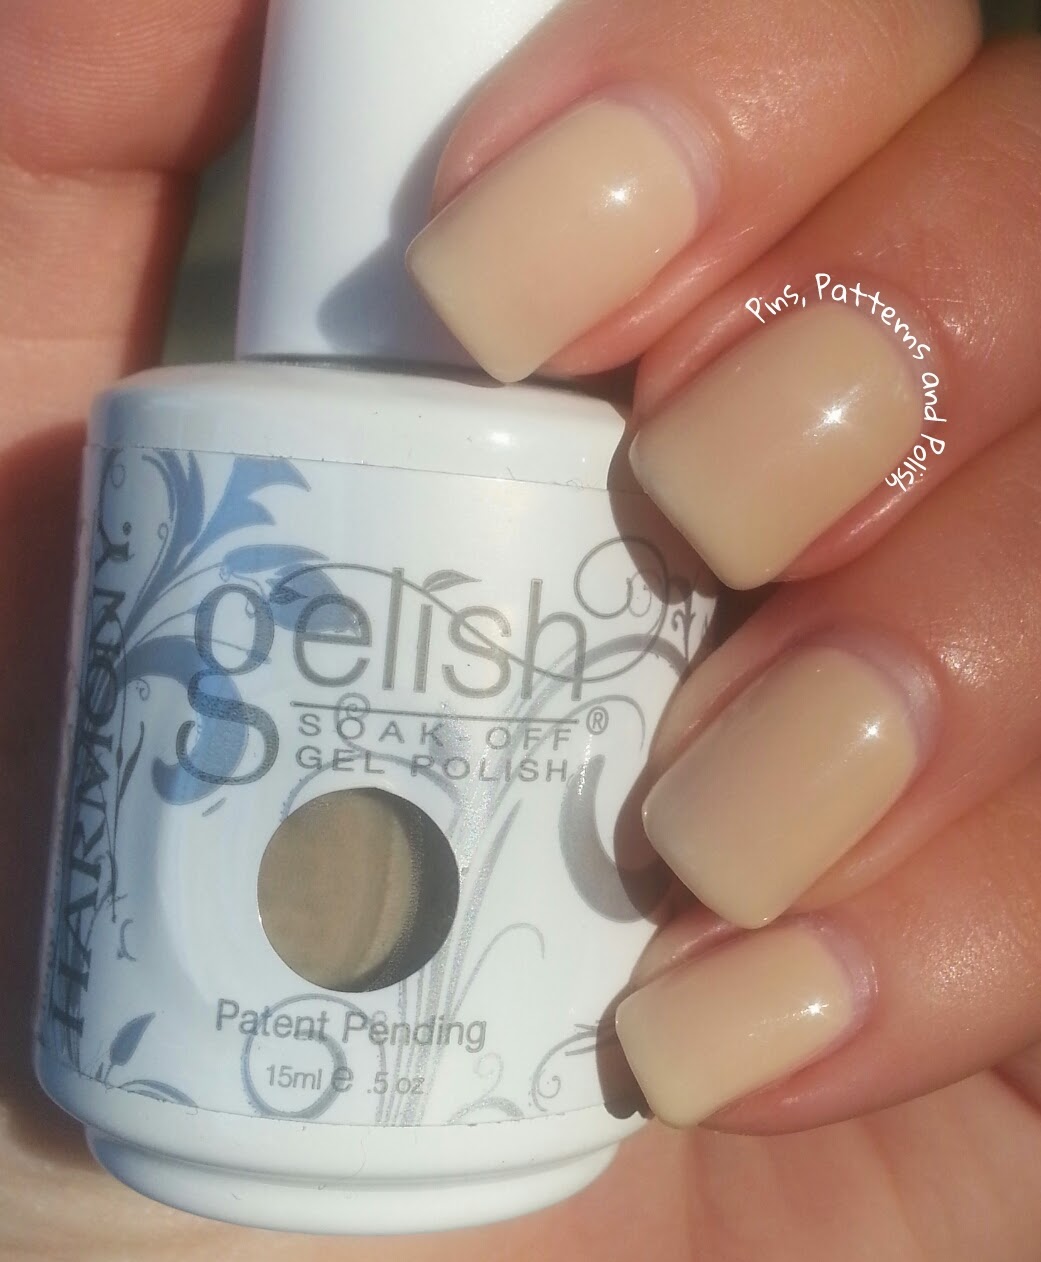 |
| Gelish Need a Tan on day 9 |
This picture shows the Gelish mani the day I took it off. I only had it on 9 days, but it's looking pretty darn good. Still shiny and perfect. The reason I removed it is because my original application was not the best, I had grow out and I was starting to pick at it (gasp!). It had not started to chip or anything, but there was a bit of lifting at the cuticles on my right hand which I think is because of my heavy handedness with the remover.
 |
| Gelish Need a Tan on day 9 |
My first impressions of this product are that it's amazing. I can't believe how strong it is and how long it lasts. It's chip free! Yes removal is a pain in the rear and you must be patient. If you try to pry off bits of gel that are still attached you will take layers of your nail with it. The colour selection with Gelish is also fantastic, however my regular polish collection is pretty large so I don't want too many Gelish colours as I can paint on top. Gel polishes are also really good for making custom mixes as the polish doesn't dry out. you can leave your mixed creation on a piece of alfoil or on a paint palette throughout your whole manicure and it will not dry. I think that is pretty awesome! Just don't use too much as it will be hard to store unless you have an empty bottle to put it in.
What I don't like about Gelish, or gel in particular:
- Cleanup. You have to do it before you cure or there's no going back.
- Gel can cause allergic reactions in people, most likely due to the tacky layer or uncured gel being overexposed to the skin. So please be careful.
- Price. Gel is expensive! I refuse to buy Chinese imitations or 'cheap' knock off brands. These are some serious chemicals, not to be played with. I will only be buying Gelish or Gelish compatible products.
- You need to use super thin layers, ridiculously thin or the product will pool in your side walls or at your cuticles. It can also cause improper curing if your layers are too thick.
Clearly none of these are deal breakers or I wouldn't use it. But I do follow the instructions carefully!
What I love about gel:
- When you're done, you're done. There is no dry time, rock hard nails that are so so shiny. Also, the shine does not disappear!
- It's very customisable. You don't have to have a colour coat, you can just go clear or use Vitagel if you want a soak off overlay to protect your nails. Or you can do french manis just paint on top when you get bored. There's also a product called structure gel that can help fix a cracked nail and add a ton of strength to your mani.You can stamp over your gel polish as much as you like and remove it without an issue. I love this!
- Your nails grow undisturbed, they are strong with the product on, allowing them to gain length.
- Regular polish sticks really well to gel. It's very long wearing and you can change colours as frequently as you like.
 |
| Gelish Need a Tan |
If I was going to give anyone advice before trying this out themselves I would;
- Recommend you go to a salon and have it done there first. Watch how they do it, see if you like it. I didn't do this for two reasons; I'm kind of phobic of other people touching me (I don't get massages for that reason), It's really expensive here to go to a good place, like $80 for the salon I wanted to try.
- Read up all you can online and check that it's the right product for you.
- You can never have too much cuticle oil.
- Follow the instructions to a T. You think pH bond is a waste of time? Maybe that's why your nails lift earlier. You interchange brand base and top coats? Well you could be in for a real treat as not all brands work together. You bought a light on ebay and don't know the wattage or curing times? You risk under or over curing your nails. Buy the lamp that goes with the system you use. It might be more expensive but I'll happily pay that in return for a product that works and doesn't put me at a higher risk of allergic reactions.
So, what do you think of gel polish? Would you try it?
Pins, Patterns and Polish
What an AMAZING post! So much detail you answered questions I didn't even know I had. The trick of putting regular polish over the top is brilliant :)
ReplyDelete